In Scott Kelby's Seven-Point System for Lightroom distills the editing process down to the seven most important adjustments you need to enhance your photos professionally. He also explains the correct order for them, as well as when and how to apply these seven techniques. Here is a preview of Lesson 13, Evening Photo.
In this lesson, Scott works with the photo below, an evening shot of the Parliament Building in Budapest that he took during a river cruise on the Danube.
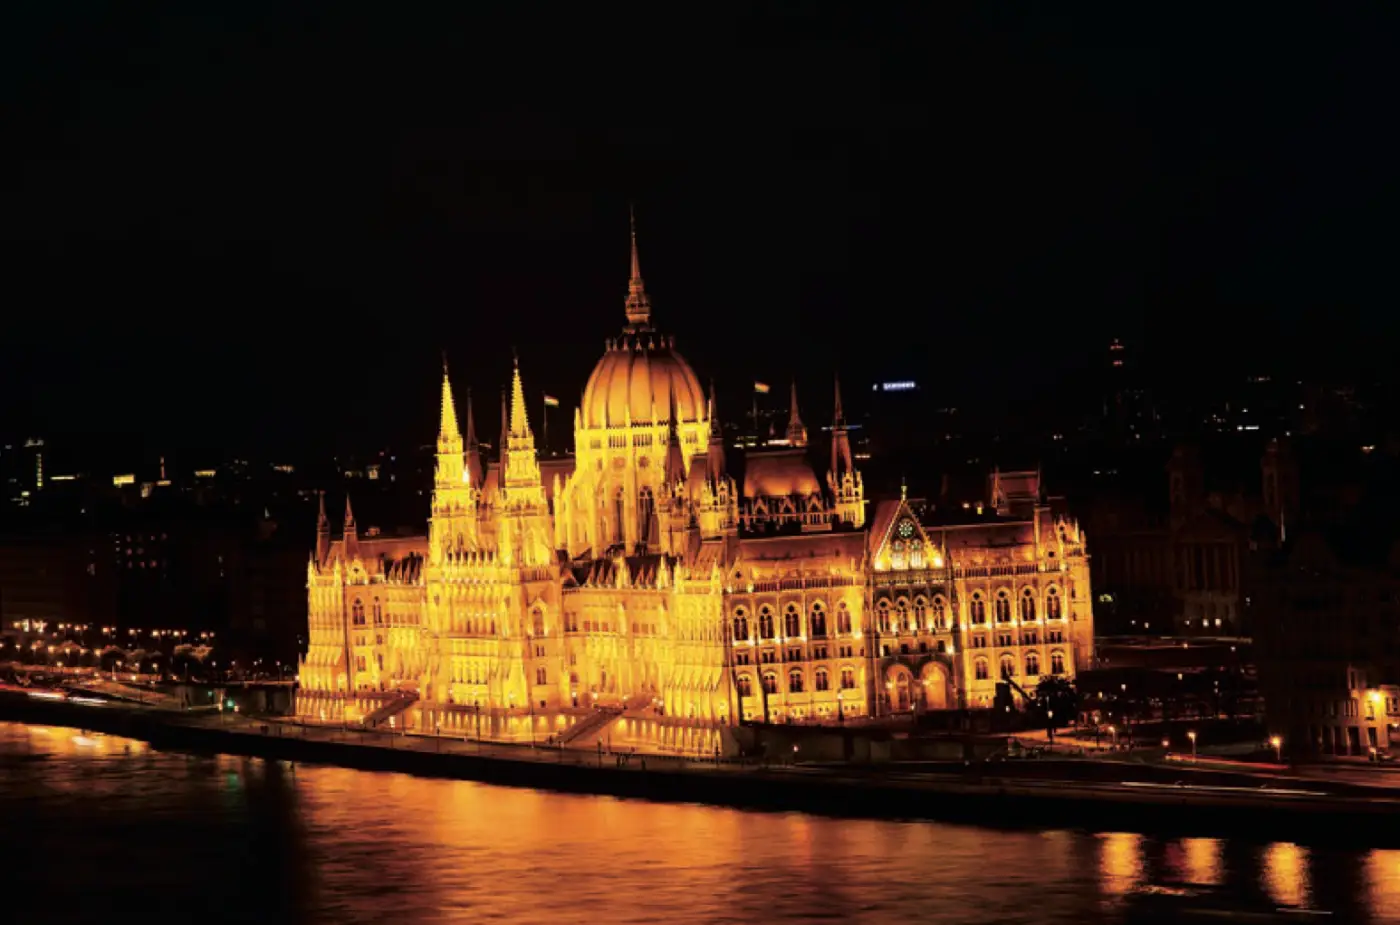
Several problems immediately stand out, the most obvious being that he apparently paid no attention to straight lines. The colors are also far too warm, the sky is completely black, and the illuminated areas are much too bright. These are common issues with photos taken in the evening.
Step 1
Open the original RAW photo.
Step 2
Check whether a RAW profile is available that provides a better starting point for editing (point 1). Review the options in the Profile drop-down menu at the top of the Basic panel in the Develop module (or the Edit panel in Lightroom Cloud).
Of all the available options, Adobe Landscape seems the most logical. Although this profile reduces the brightness of the building slightly, it does not really improve the colors. Still, because it appears to be the best choice, we will use Adobe Landscape.
Step 3
Lens problems are normally addressed later in the seven-point system (point 6). But because the image needs to be corrected with the Transform panel anyway, which is closely related to the Lens Corrections panel, you might as well correct the distortion now, since it is a lens issue.

Go to the Lens Corrections panel (called the Optics panel in the cloud version of Lightroom) and select the Enable Profile Corrections checkbox (see photo). This should correct the distortion; you will see the difference as soon as you select the checkbox.
Step 4
Now go to the Transform panel (or Geometry in Lightroom Cloud) and move the Rotate slider to the right to +2.8 (make sure Constrain Crop is selected).
Instead of using the Crop Overlay tool to straighten the image, we choose this method because it can sometimes make straightening photos easier.
Step 5
Now make the black sky bluer. In the Basic panel (or Color in Lightroom Cloud), drag the Temperature slider to the left to approximately 2450 for a blue-hour sky (point 2).
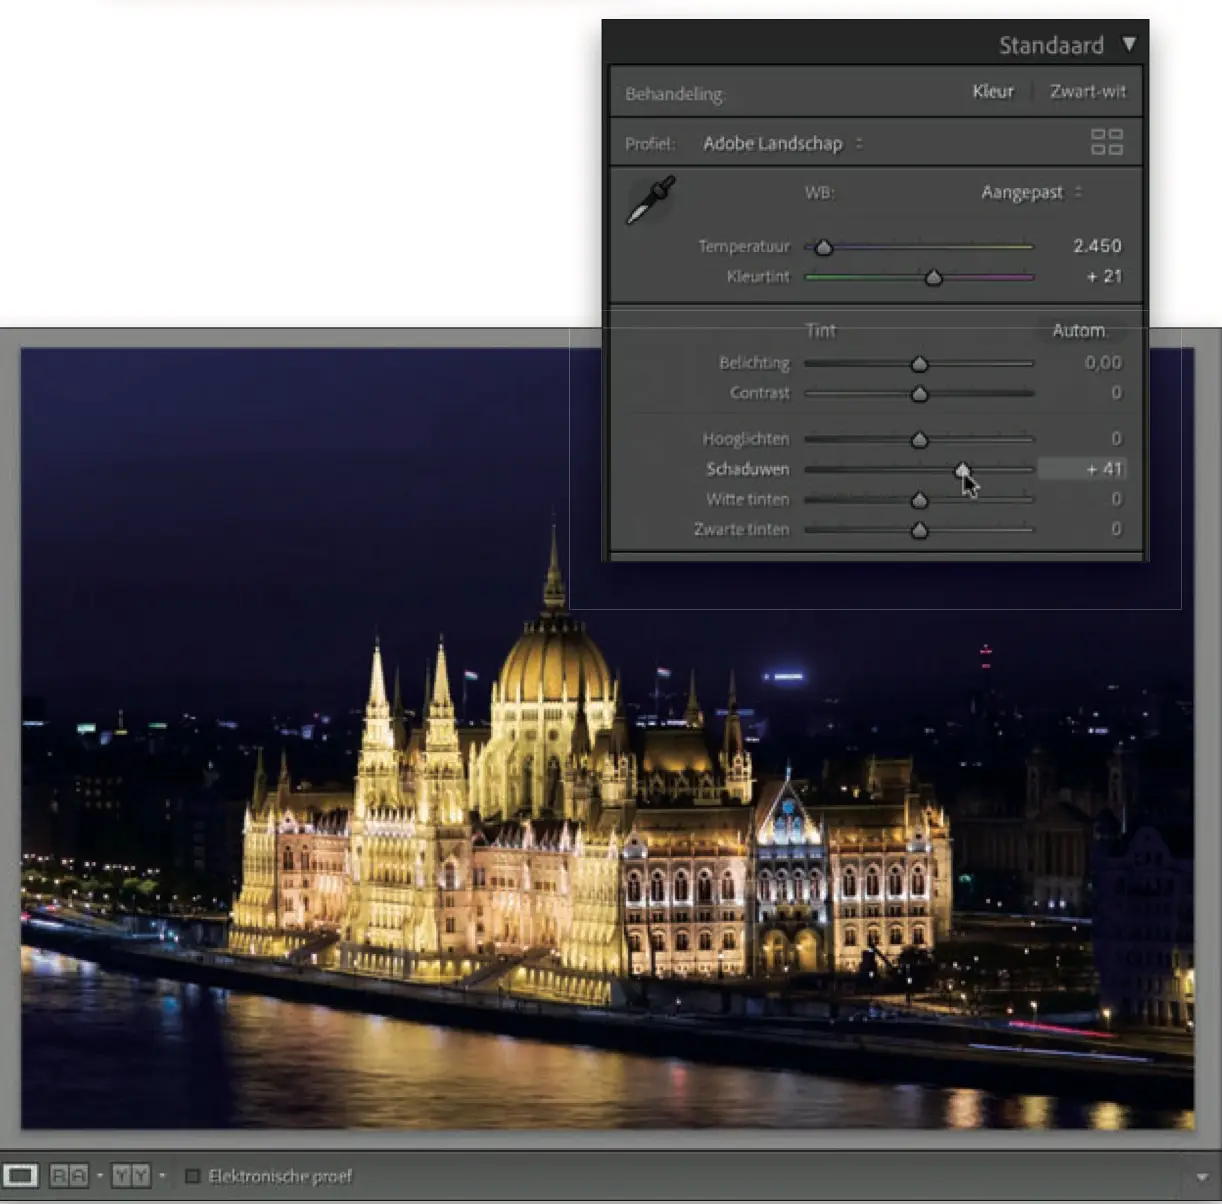
You do not always have to go this far to create a beautiful evening sky. If you want to intensify the blue, increase Shadows to approximately +41 (in the Light panel in Lightroom Cloud). Also note the effect of this adjustment on the Parliament Building; in Kelby's photo, Tint was increased to +21. The result looks promising.
Step 6
It is time to set the white and black points (point 3). To do this, hold down Shift and double-click first the word Whites and then Blacks to set them automatically. You will see that Whites goes all the way to –100, which shows just how bright the building had become.
Blacks does not change much, settling at –15, and the overall exposure is now quite good. There is no need to touch the Exposure slider.
Step 7
Let's focus on the building. Using the Adjustment Brush, we can warm up its color and reduce some of the Highlights (we skip point 4 and continue with point 5). Select the Adjustment Brush (K) from the tool set below the histogram (or the Brush [B] on the right in Lightroom Cloud).
Reset all settings to zero by double-clicking Effect (this happens automatically in Lightroom Cloud), and add some yellow to the building. Set Temperature to 11 and Highlights to -21. Then brush over the entire building.
Step 8
To make sure you have painted over the entire building, press the O key on your keyboard so that the edited areas display a red overlay (see image).
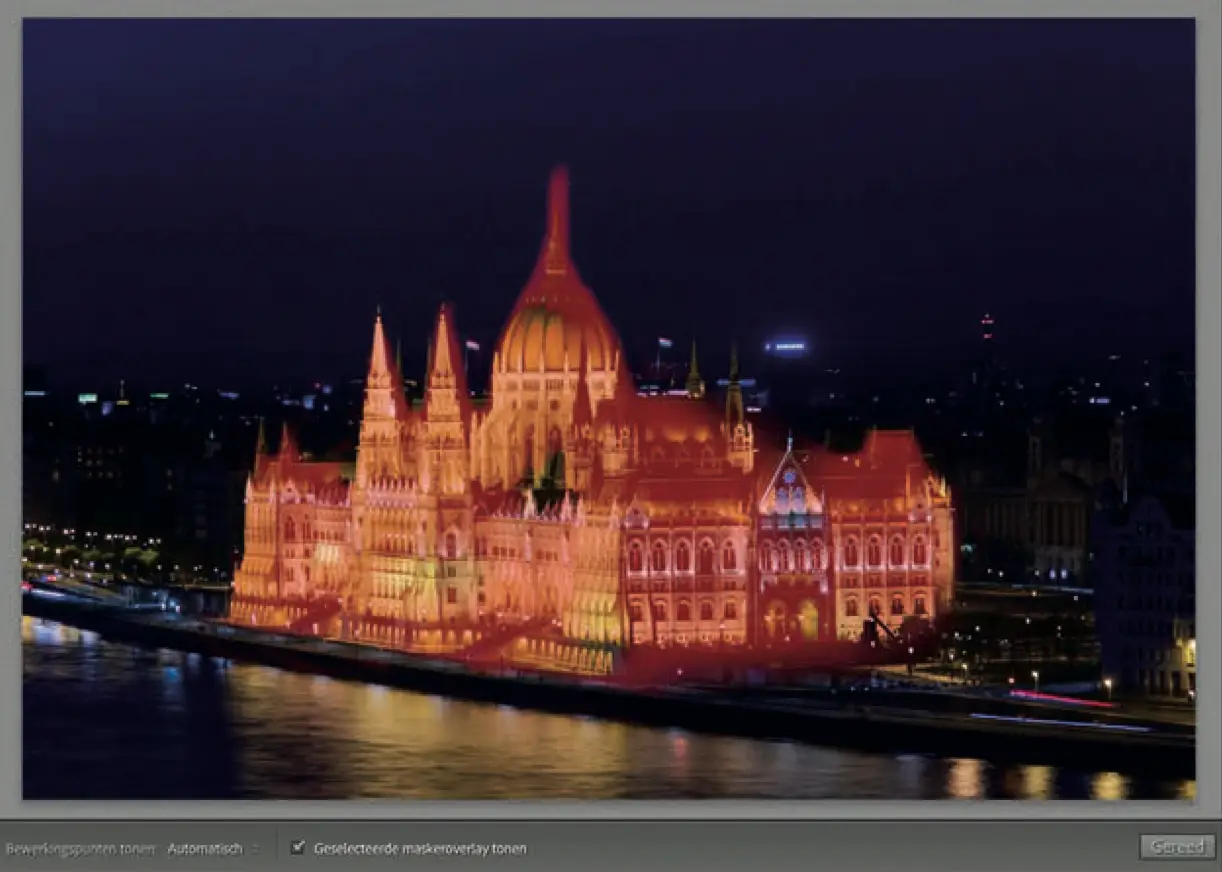
If you missed a few spots here and there, that is not a problem. This feature lets you paint over any areas you missed and erase areas you accidentally painted over.
Step 9
Reduce the brush size and paint over the areas you missed. Make sure you have not painted outside the intended areas. If you have, hold down the Option key (or Alt on a PC) to activate the Erase brush.
This brush lets you correct unwanted areas (these areas will no longer be red). When you have finished painting, press the O key to turn off the mask overlay and return to the normal view (in Lightroom Cloud, press this key three times to display only the edit pin).
Step 10
With the brush still active on the building, add Clarity and Texture to reveal more detail. Drag the Texture slider to approximately 39 and the Clarity slider to 32.
By adding Clarity and Texture only to the building, you avoid emphasizing any noise in the sky. Click the Done button below the image area when you are finished (Lightroom Cloud does not have a Done button).
Step 11
If you feel that the photo is too bright or intense after the edits, you can reduce the intensity by returning to the Basic panel (or Color in Lightroom Cloud) and moving the Vibrance slider to the left (here it was reduced to -26).
Because people who are not photographers will probably appreciate the brighter colors of the earlier edit, you might consider skipping this step if you plan to sell your photos.
Step 12
For the finishing touch (point 7), go to the Effects panel and drag the Amount slider under Post-Crop Vignetting (the Vignette panel in Lightroom Cloud) to –11 (a familiar number...) to subtly darken the edges of the photo (see image).
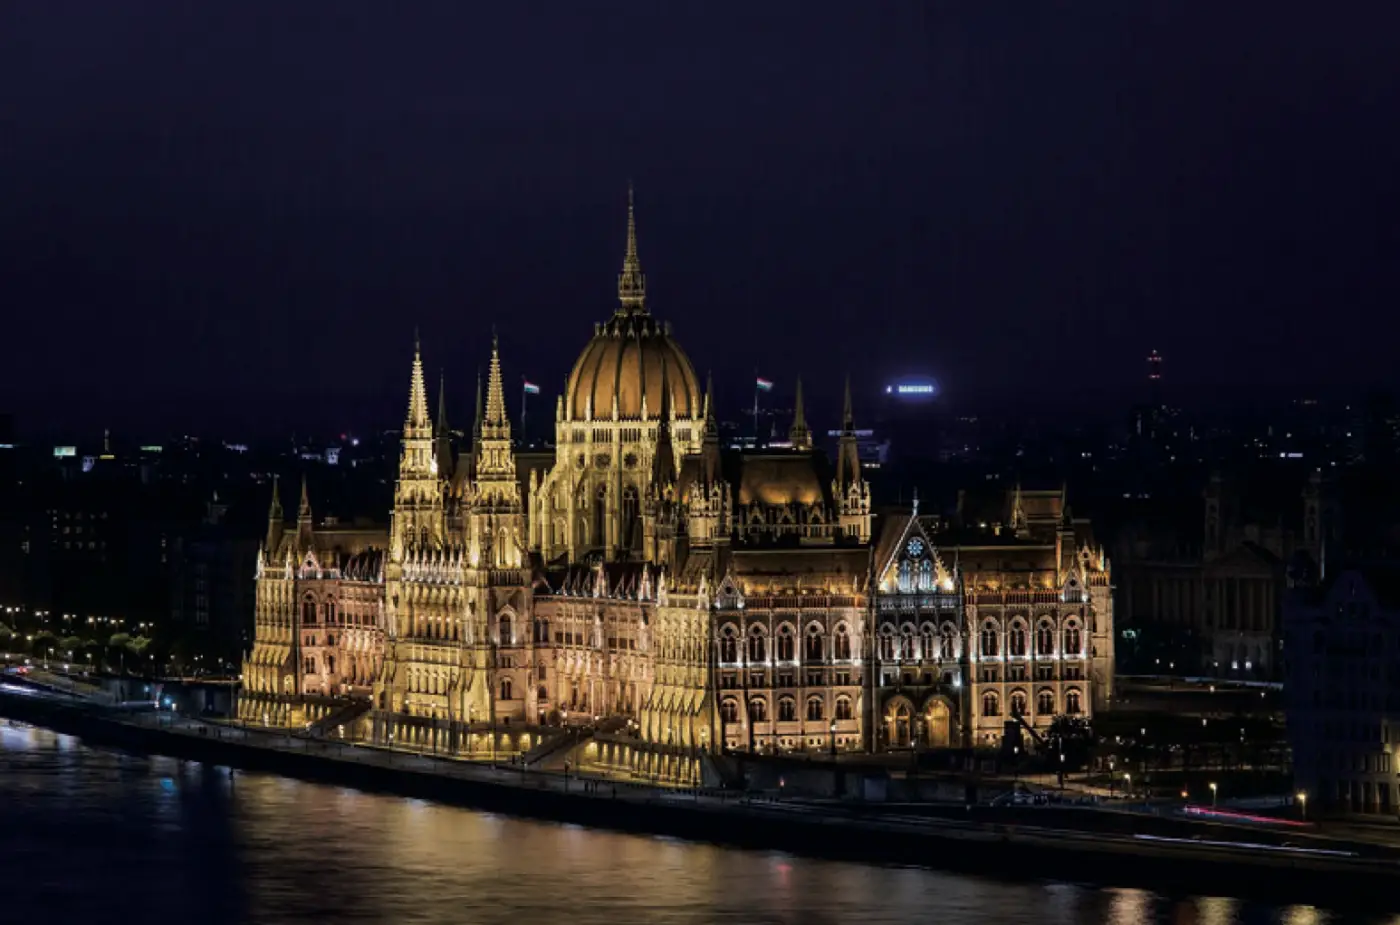
This is harder to see in photos taken in the dark, but if you toggle this adjustment on and off (using the small switch on the left side of the panel header or by holding down the mouse button over the eye icon on the right side of the panel title in Lightroom Cloud), you will see that it does make a difference.
Step 13
The final step is sharpening. In the Detail panel, drag the Amount slider (the Sharpening slider in Lightroom Cloud) to 80.
Text: © Scott Kelby's Seven-Point System for Lightroom
Scott Kelby's Seven-Point System for Lightroom - Scott Kelby
Pages: 272
Price: € 27.99 (offer price through 31-8-2023)
Publisher: Van Duuren Media



