Time and again, I hear the complaint, ‘When I open my photos in Lightroom, they look fantastic, but then they change and look awful.’ If you shoot JPEG, your camera adds contrast, sharpening, and the like in-camera. If you shoot Raw, you are telling the camera to turn off all contrast, sharpening, and similar processing. The first time you open a Raw photo in Lightroom, you see a sharp, contrast-rich preview. But that preview soon disappears, revealing the true Raw image. Here is how to create a more JPEG-like starting point.
Step One:
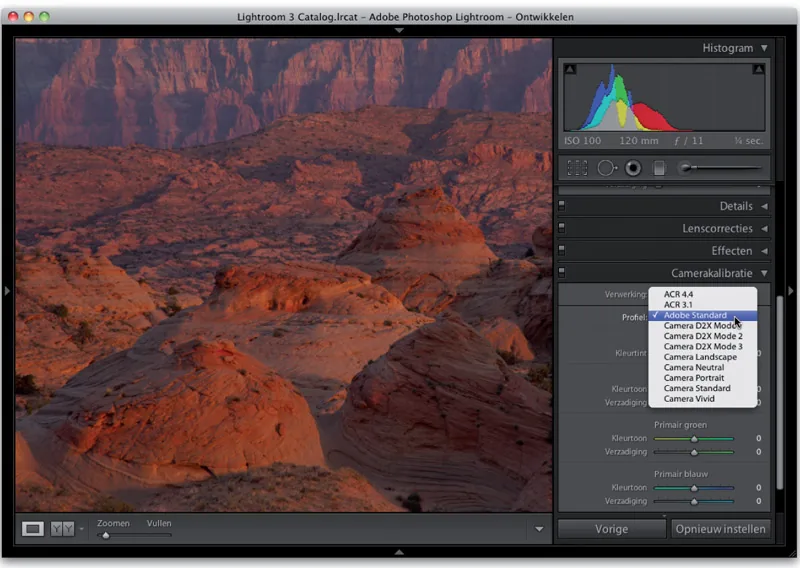
In the Develop module, go to the Camera Calibration panel. At the top of this panel is the Profile drop-down menu, which contains several profiles based on your camera's make and model. (Lightroom gets this information from the EXIF data stored in the file.)
Not every make and model is supported, but the latest Nikon and Canon digital SLRs are supported, as are several models from Pentax, Sony, Olympus, Leica, and Kodak. The profiles simulate in-camera settings that you can apply to JPEG files but that are ignored when you shoot Raw. The default profile is Adobe Standard. I find it rather plain.
Step Two:
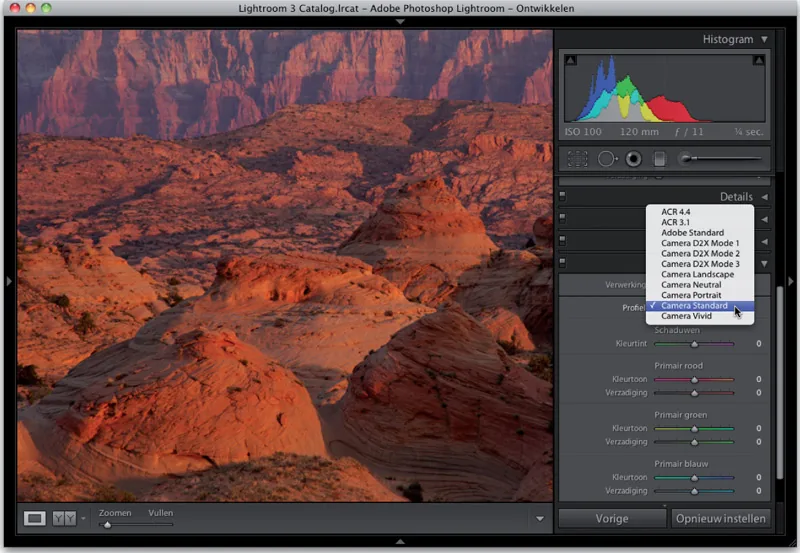
Now all you have to do is try each profile and see which one produces the best result. To my eye, a higher-contrast profile with richer colors looks more like a JPEG. I usually start with the Camera Standard profile rather than the default Adobe Standard profile.
I rarely come across a photo that looks better with Adobe Standard than with Camera Standard, so I usually choose the latter.
Note: If you shoot with a Canon, Pentax, or another brand, you will see different profiles. Their names are based on the picture styles used by the camera manufacturers.
Step Three:
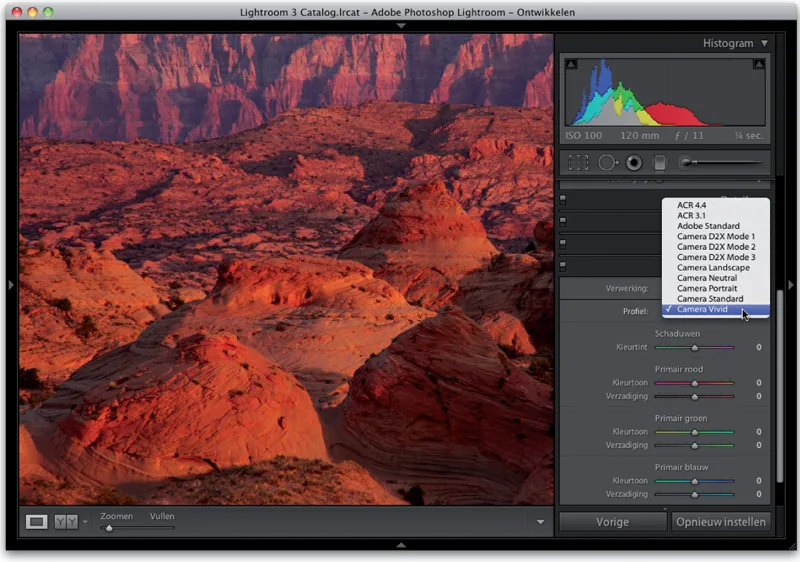
If you shoot landscapes and want that Fuji Velvia look—or simply want vivid colors—choose the Camera Vivid profile. This profile simulates the Vivid color setting you could have selected in your camera.
I like this one for landscapes, but I usually compare it with the Camera Landscapeprofile as well. I have found that the profile that works best depends greatly on the photo. I therefore recommend trying several profiles to discover which one works best for the image you are currently editing.
Note: If you shoot in Camera Raw, you will also get several of these profiles. If you shot in JPEG mode, you will see only one profile: Embedded.
TIP: Create your own profiles
Adobe's free DNG Profile Editor lets you create your own profiles. You can find the program at http://labs.adobe.com/wiki/index.php/DNG-Profiles.
Step Four:
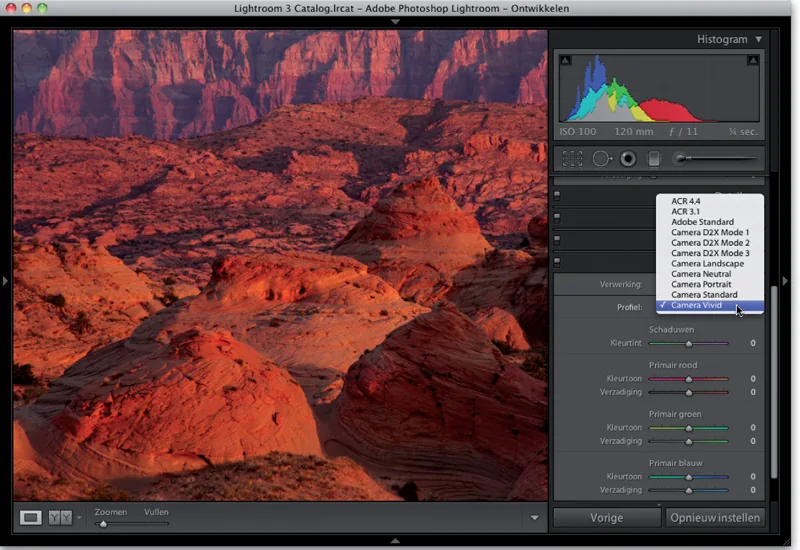
Here you see a before-and-after comparison in which I changed only the camera profile to Camera Vivid. Adobe does not claim that these profiles create the look of a JPEG image, but I think they get you fairly close. I use them when I want my starting point to look more like the JPEG image I saw on the back of my camera.
TIP: Apply profiles automatically
If you apply your favorite profile to many photos, go to the Develop module, choose the profile (and do nothing else in this module), and create a preset with that name. From then on, you can automatically apply the style to every photo you import. Simply choose this preset from the drop-down menu in the Import dialog.



