
Of course, you will read the manual thoroughly later, but these instructions will get you started right away. If the battery does not need to be charged first, you can be taking photographs with your new digital SLR just minutes after arriving home. Enjoy!
Clock/date
When the camera is used for the first time, a screen for setting the date and time appears. It is usually self-explanatory, and you can set everything immediately. If you make a mistake, the camera closes this setting and starts with its general factory date, for example 01 01 2007. That is not a problem the first time, but remember to set the correct date and time later.
Memory card
Open the memory-card slot cover and insert the card into the camera (the card slot is sometimes in the battery compartment). The card only fits one way. If you feel resistance, do not force it! There is often a diagram showing how to insert the card. Never use extra force! Truly, never! Damage to the card reader is not covered by the warranty, and replacement can be extremely expensive. If in doubt, consult the manual.
The card must be formatted in the camera for which it is intended.
Format?
Officially, you should always format a memory card first in the camera in which it will be used. This ensures that your photographs are written to the card correctly. It is not difficult: the ‘format’ function is usually somewhere in the menu marked with a tool icon.
If you cannot find it quickly, you may skip formatting during your first introduction to the camera. But be sure to format your card before your first serious photo session. Caution: formatting erases everything on the card!
Start shooting!
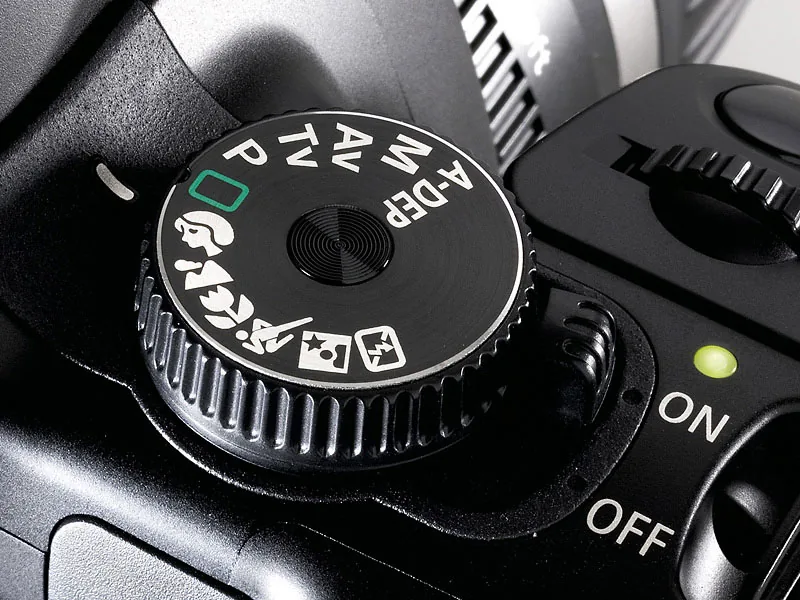
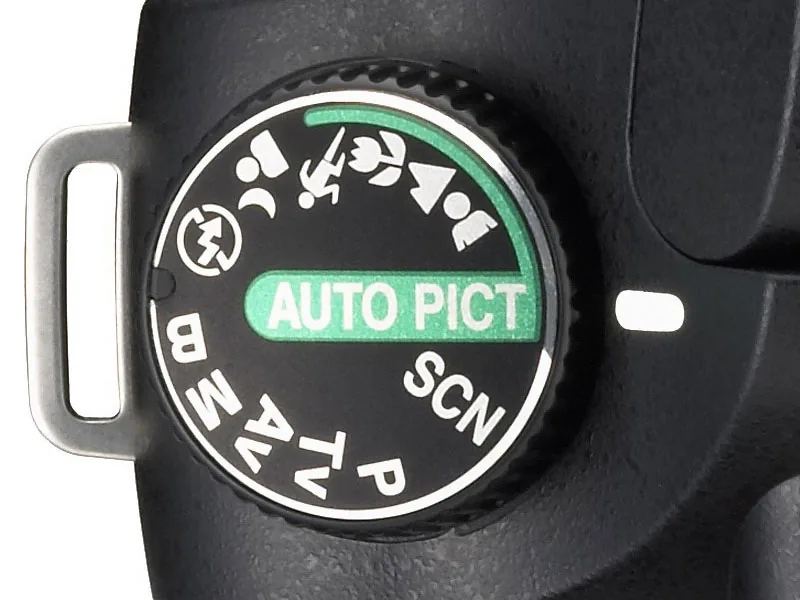
Set the camera to its most general mode, usually indicated in green (Auto, for example). The camera will then control everything itself. It will even raise the flash when flash is needed. All the intelligence built into the camera is activated to help your photographs succeed. And it works, as you will soon see.
Forget the manual for a moment—get results first!
Press the shutter button halfway until the image is in focus, then press it fully. The photograph you just took appears briefly on the rear screen. You can adjust later how long it remains visible. To view photographs at length, select playback mode, usually marked with a green rectangle containing a right-pointing triangle.
Can't that flash be turned off?
One thing that can quickly become irritating during your first introduction is the flash popping up automatically. This usually happens only in the camera's most automatic mode and in a few scene modes. If you want to stop it during your first session, simply set the camera to P mode. The flash will then be used only when you raise it. Some cameras have a menu setting that disables the flash from popping up automatically in all modes. Other cameras have a flash-off setting on the mode dial.
Feel free to set a higher ISO value.
ISO
Digital SLRs work well at high ISO values. You can often shoot perfectly well without flash, even if the camera chooses to use it. Especially if your first experiments take place indoors, it is therefore useful to start working at ISO 400 or 800 right away.
You will often find the ISO setting on the outside of the camera. Press the button marked ISO and turn the command dial until the desired ISO value is set.
Inspect the result
You will probably view your first results on the screen on the back of the camera. You can zoom in on that image by turning one of the camera's command dials. This lets you check, for example, whether the subject is truly in sharp focus.
Use the navigation buttons or switch on the back of the camera to move around the entire enlarged image. A first introduction often takes place indoors: relatively little light means holding the camera very steady, especially when you are not using flash.
Experiment without panic
Many settings are fixed in fully automatic mode. Fortunately, that green mode lets you return directly from even the most exotic settings to normal camera operation. If you then switch back from there to P mode, however, the camera again selects the settings you last used in that mode. For example, if you set flash compensation to –0.7 in P mode, it remains there until you reset it yourself. After extensive experimentation, returning every setting to its default can be quite a task. That is why every camera has a menu command that resets all settings (with a few exceptions) to their defaults. Sometimes this can also be done with a combination of buttons on the camera body.
Fully automatic mode and the scene modes will take you a long way for now!
Learning as you shoot
If you want quick results with your SLR and think, 'I'll learn the rest later,' use only fully automatic mode and the scene modes for now. You will soon discover whether they meet your needs.
But you will probably discover that some photographs could have been better. That may relate to your viewpoint, the angle of view, your position relative to the sun, or the composition, but also to technical camera matters such as focus and exposure. As you look for ways to improve next time, you will get to know your camera better. Special settings are easiest to remember when you connect them to specific situations.



