Now that the white balance is correct, it is time to adjust the photo's exposure. Although there is an Exposure slider, setting the overall exposure requires three (and sometimes four) sliders. Fortunately, this is not only much easier than it sounds, but Lightroom also has several tools that simplify the job.
Step One:
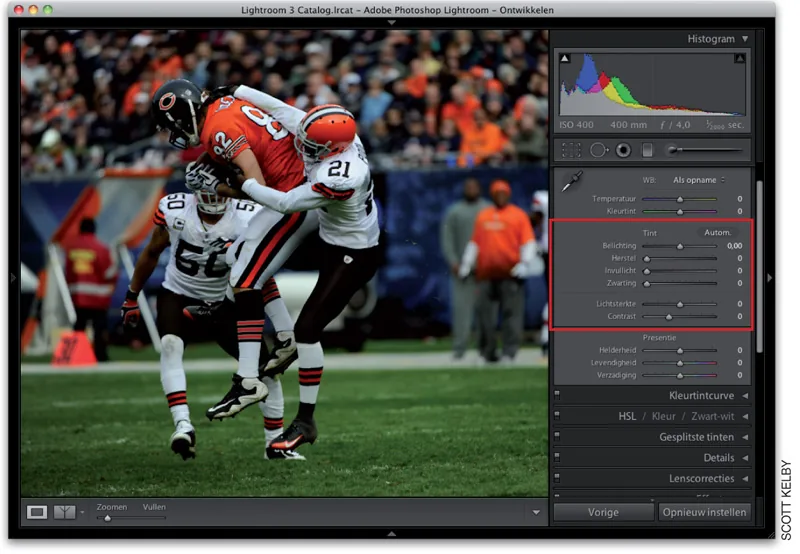
You adjust the exposure in the Tone section of the Basic panel. (A red outline marks it in the image.) The photo shown here appears underexposed.
In the Histogram panel, you can see that the right side of the histogram contains almost no data. (Normally, all the highlights would be there.)
So if you want to know whether the photo really is underexposed, there is your answer.
Step Two:
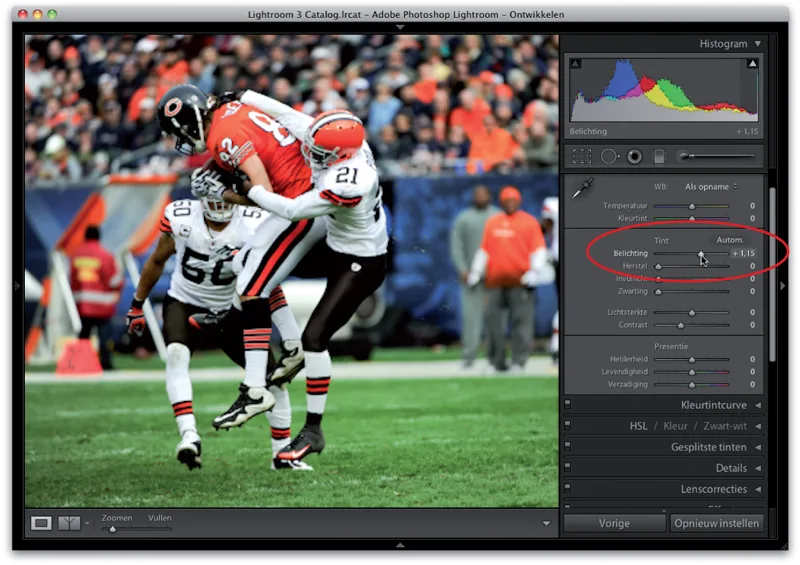
Click and drag the Exposure slider to the right (see image) to brighten the entire photo. (As with the white-balance controls, you also get a hint about which way to drag. The right side is white, meaning that dragging in that direction makes everything brighter. Dragging left, toward black, makes everything darker.)
It could not be easier. But be careful not to drag too far to the right, because you may lose highlight detail. The highlights then become white areas with no detail at all.
Fortunately, Lightroom not only warns you when highlights are clipped, but usually lets you fix the problem as well.
Step Three:

At the upper right of the Histogram panel is a triangle. This warning triangle indicates clipped highlights. Ideally, it is black. If it turns blue, highlight detail is being lost, but only in the blue channel. (That is not ideal, but it is not the worst thing that can happen.)
If it is red or green, you are losing detail in those channels. The worst situation is when it is white (see image). This means the highlights are heavily clipped and detail is being lost in all three channels.
The key question is whether this occurs in areas with important detail. If not, you can ignore the warning. (In a photo that includes the sun, the sun causes highlight clipping. But because there is no detail there anyway, that is not a problem.) Click the white triangle to see where highlights are clipped. Those areas are marked in red. (In the adjacent photo, the white shirts worn by players 21 and 50 contain many clipped areas.)
Step Four:
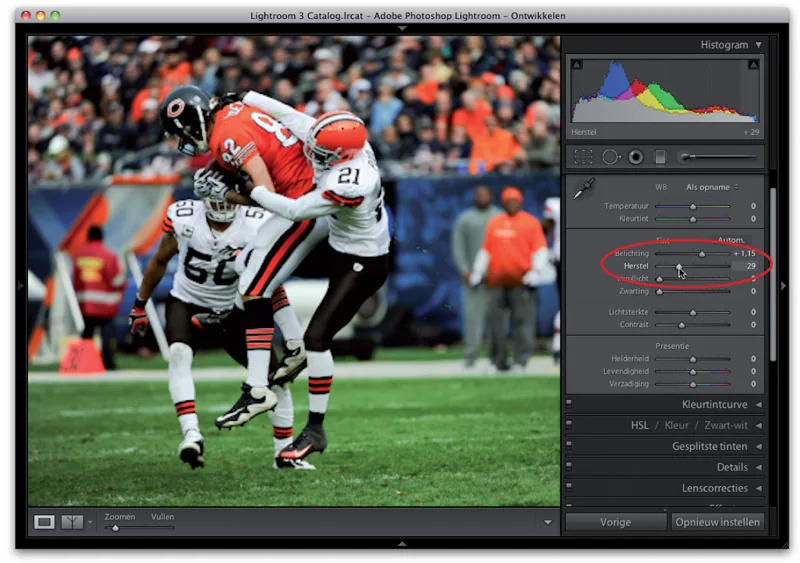
But I definitely want detail in those shirts. Dragging the Exposure slider to the left restores the detail, but makes the exposure too dark. When this happens (and I promise it will), reach for the Recovery slider. This is one of Lightroom's most brilliant sliders.
Dragging it to the right reduces only the brightest highlights—the areas where the highlights are clipped—so it does not ruin the photo's exposure. Drag right until the red warning areas disappear from the photo and the triangle turns black (see image).
This gives you the best of both worlds: the entire photo becomes brighter without losing detail in the bright areas.
Step Five:

When editing photos, therefore, always start with the Exposure slider. As soon as warnings appear, drag the Recovery slider to the right until all the highlights are under control again.
There is also a second method if you do not like the red overlay used for clipped highlights (or if the photo itself contains so much red that the warnings are hard to see). Hold down the Option key (PC: Alt) while dragging the Exposure slider. All clipped highlight areas now turn white (see image). You can use the same keys with the Recovery slider. Keep dragging until the areas turn black again.
TIP: Turning warnings on and off
Tip: You do not have to keep returning to the triangle at the top of the panel. Press J to toggle the red areas that indicate lost highlight detail on or off.
Step Six:
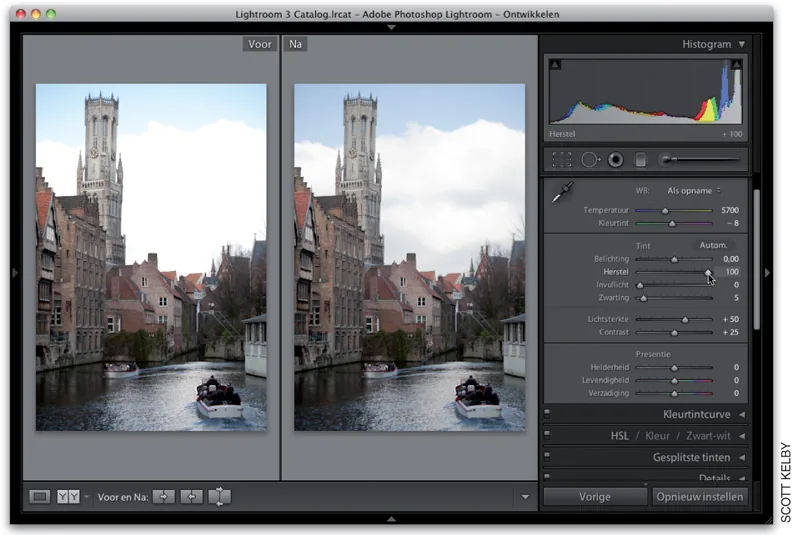
For another hidden benefit of the Recovery slider, let us switch to a different photo. The slider works wonders when adding detail and life to skies in landscape photos, especially when they contain many clouds.
Simply drag the Recovery slider all the way to the right (to 100) and examine its effect on the sky. Try it and judge for yourself.
TIP: Quick editing:
This is one of my favorite Lightroom shortcuts: press the period key (.) to move quickly to the next slider in the Basic panel. The adjustment name is then highlighted. Use the plus (+) and minus (-) keys to increase or decrease the value. Press the comma key (,) to go back. Beautiful!
Step Seven:

For the next step in our exposure adjustment, I am using a different photo. The next slider used to adjust exposure is Blacks. (We will skip the Fill Light slider until Chapter 6, because you use it when you have problems with backlighting.)
The Blacks slider adjusts the darkest shadows in the photo. Drag it right to add more black to those shadows, or left to brighten the areas. If a photo looks washed out, I always drag this slider to the right (see image). That restores considerable color and depth to the shadow areas. (In the image on the left, the original photo is at the top; in the photo below it, I increased Blacks and Recovery to reveal more detail in the sky.)
Frankly, I would rather lose shadow detail than highlight detail. If you love richly detailed shadows, watch the triangle at the upper left of the histogram to see when shadows are clipped. Or press J so that all clipped shadow areas turn blue.
Step Eight
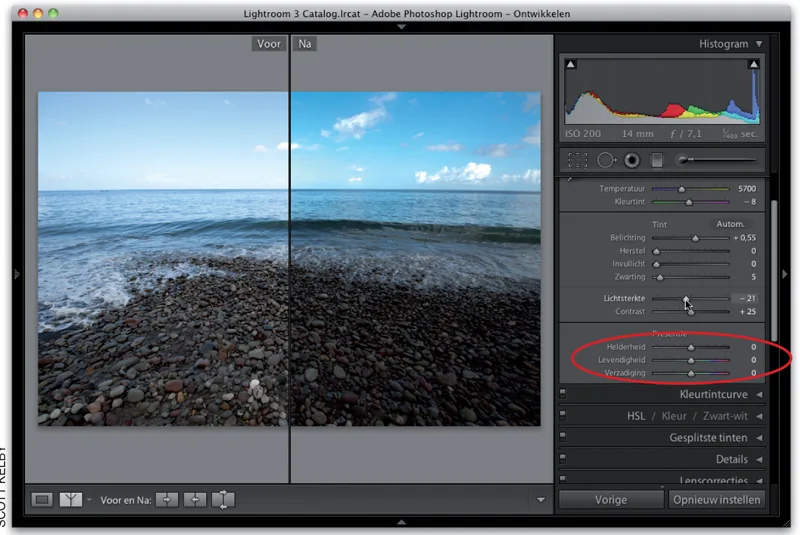
The Brightness slider (circled in red in the image) acts as a midtone slider. (It is similar to the middle, midtone slider in Photoshop's Levels adjustment.) Drag the slider right to brighten the midtones. To make them darker, of course, drag it left.
I use this slider whenever I see a washed-out sky. (In the before-and-after comparison shown here, I lowered Brightness to -20. Because the result became slightly too dark, I raised Exposure a little. We will ignore the Contrast slider—dragging it right makes bright areas brighter and dark areas darker. To add contrast, we use a much more powerful tool, the Tone Curve, which you will read about shortly.)
Step Nine:
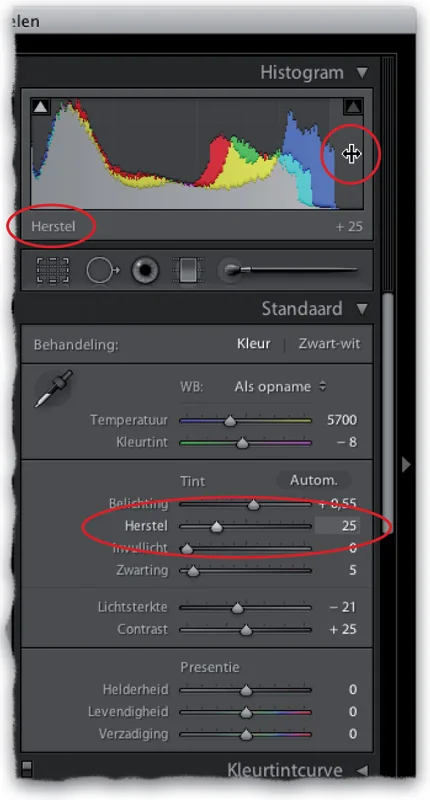
The Histogram panel, the top panel on the right, is genuinely useful. At a glance, you can see whether highlights are being clipped.
For example, if you see many pixels pressed against the right side of the histogram, you know that a substantial number of highlights are being clipped. (Ideally, you should see a small gap between the right edge and the histogram itself.)
You can also use the histogram to discover which slider affects each part of it. Move the pointer over the histogram and look directly below it. The name of the slider that affects that area appears there.
In addition, the slider's name and value are highlighted in the Tone section, so you can find it quickly (see image).
In the example, the pointer is at the far right of the histogram, and you can see that the Recovery slider affects that area. Very useful. But there is more.
Step Ten:
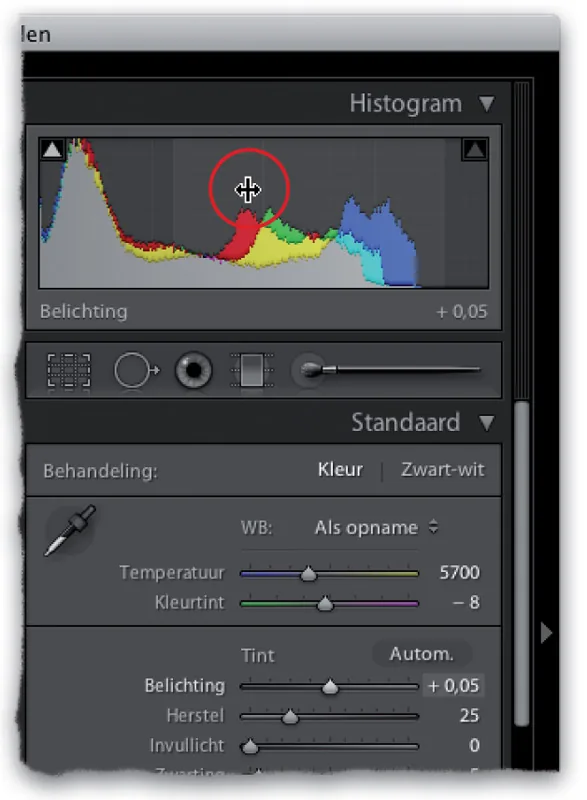
You can click and drag anywhere in the histogram. As you drag left or right, that area of the histogram changes, along with the corresponding slider.
You read that correctly: adjust the photo simply by dragging the histogram.
Try it. Place the pointer in the histogram, then click and drag.
I do not know anyone who actually corrects photos this way, but it is certainly fun to try.
Step Eleven:
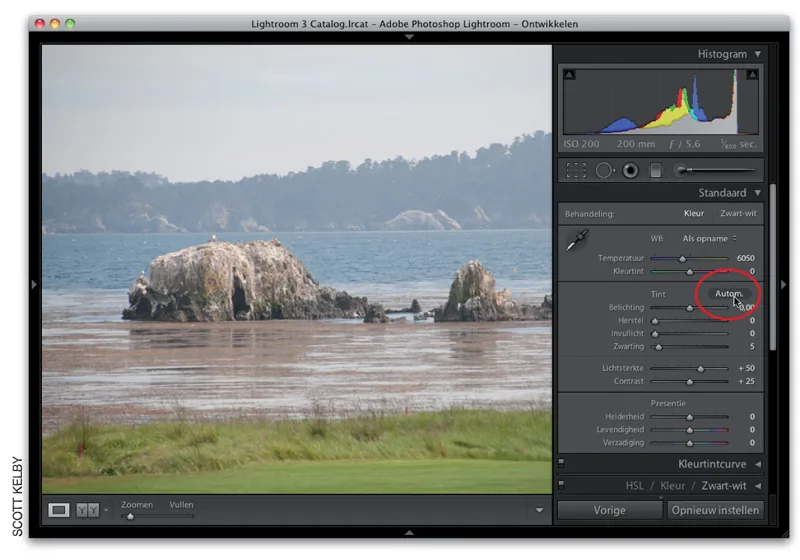
We have not yet discussed the Auto button above the Exposure slider. It has improved steadily since Lightroom 1. (Once, clicking it was a major mistake.)
In Lightroom 3, the button works even better because it now also adjusts the amount of fill light. Click it if you are stuck and do not know what to do next. It is much better than you might think.
TIP: Resetting the sliders
For any slider, double-click the small handle you drag to restore its original value. Even easier, double-click the slider's name.
Step Twelve:
Here is the result after I clicked the Auto button. The effect is not earth-shattering, but it is not bad either. It is a useful starting point when you are unsure what to do next. Sometimes it works wonderfully and sometimes it does not, but it is certainly usable.
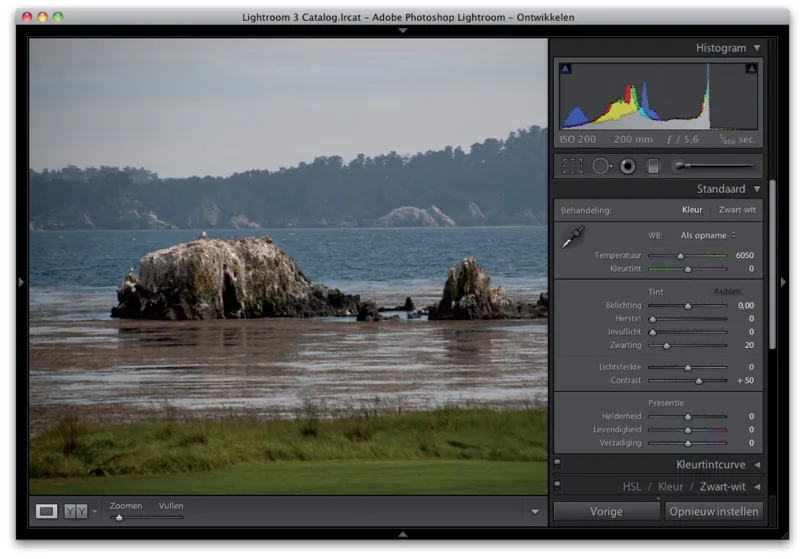
Keep in mind that the photo is sometimes adjusted in a way that creates clipped highlights. Do not ask me why, but it happens. It should know better, but sometimes that is simply how it goes. Remember this and drag the Recovery slider to the right if it happens.
Those are the three main sliders used to adjust exposure. I use Exposure most often, followed by Blacks. I use Brightness least. Some photos require an Exposure adjustment, while others need all three. At least now you know what they do.
This was a preview from Scott Kelby's The Lightroom 3 Book, Chapter 4, Developing Your Photos (7)



