Macro photography encompasses many different techniques. Macro photographers often work with a tripod and may use bellows or reversing rings on the lens, ring flashes or reflectors, extension tubes and teleconverters, studio setups, and much more.
Macro photography can therefore seem highly technical, and photographers sometimes look to technology for the solution, buying even more equipment.
Every situation, however, presents different photographic trade-offs, limitations, and possibilities. How you approach them and which technique you use depend greatly on personal preference.
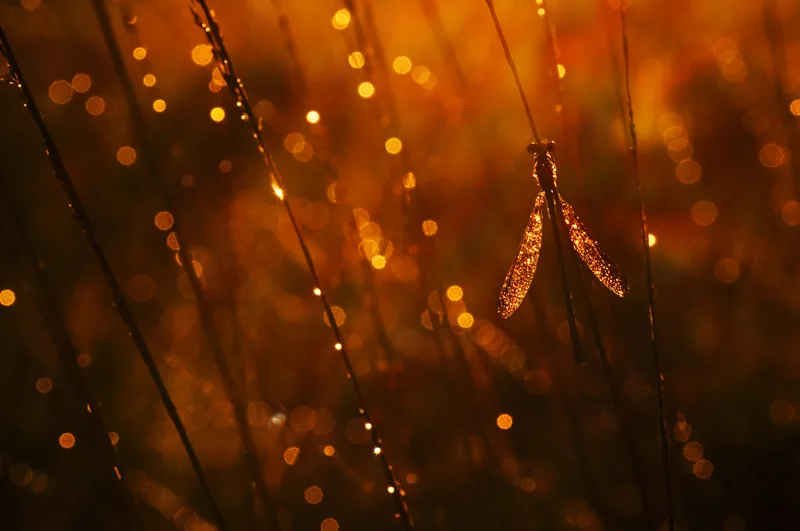
Photo above: The aperture was stopped all the way down for this backlit shot to emphasize every droplet and its reflections in the blur. Because of the high F-number, the out-of-focus areas play an even greater role. The damselfly was positioned in the composition so that it hangs just clear of the reflections. A tripod was used for this photo. The damselfly was about 50 cm above the ground, and the vegetation left enough room to maneuver with a tripod.
Most of my macro photos are made with the Tamron 90 mm F2.8 macro lens, sometimes on a tripod, usually handheld, and occasionally with extension tubes on a telephoto lens. It is relatively simple, accessible, and affordable.
Working without a tripod allows for greater creativity
The Tamron 90 mm F2.8 macro lens offers good value for money. It is tack-sharp and produces smooth, soft blur.
Of course, there are other good macro lenses. A 1:1 marking on a macro lens means that an object the size of a matchbox can fill the frame; this is considered the standard magnification for macro photography.
Anyone who wants to go beyond that standard magnification can now use specialized lenses such as the Laowa Aurogon lenses, which offer magnifications of up to an impressive 10x.
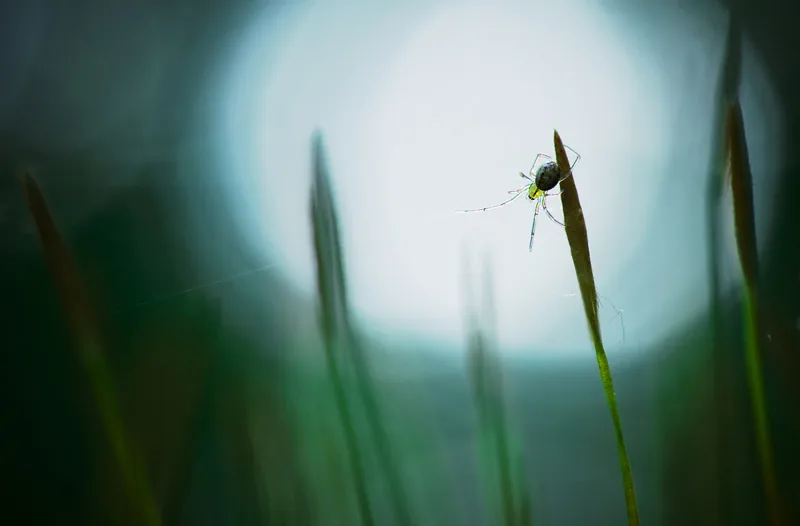
Photo above: This image was made in the woods; the bright patch is early light entering the scene. The spider is partly translucent, and the exposure was chosen to be bright so that light would also shine through its legs. Lying down provided some stability and allowed the light to serve as soft backlighting, while also helping the subject and a few blades of grass stand out.
Working without a tripod gives you a great deal of freedom of movement. As you look through the viewfinder, every shift and tilt changes the angle of view, often revealing entirely different images of the same subject. Your angle is therefore crucial. Vegetation can also leave too little room to work with a tripod.
The limit for shooting handheld varies by lens and by photographer
Extension tubes are an inexpensive way to focus close to a subject because they shorten the focusing distance. You lose infinity focus and retain only a limited range in which the lens can focus.
I have used this setup several times on a telephoto lens (400 m) for moor frogs. They are more skittish and do not always let you get close enough for a macro lens to be useful, so extension tubes on a telephoto lens can provide the solution.
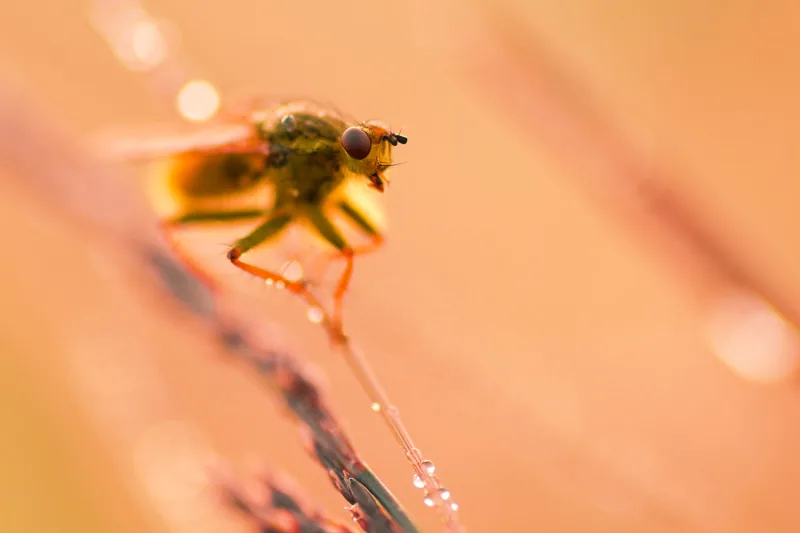
Photo above: It does not matter what appears in front of the lens—if there are creative possibilities, anything can become a picture. Here, I looked for a way to use the blurred stem to strengthen the image, leaving space between the fly and the stem now visible on the right. The fly was still drying and could not yet fly away, so with a careful approach it stayed put and gave me time to choose a position and angle.
The most important tips at a glance
- For exposure, I choose the semiautomatic aperture-priority mode—the A setting.
- My camera’s standard sensitivity is ISO 200, the factory setting at which image quality is optimal. I leave the camera there and raise the ISO manually only when the situation would otherwise produce an inadequate shutter speed.
- The shutter speed must be high enough for handheld shooting. I personally need at least 1/60 to avoid camera shake. If the shutter speed drops below that critical 1/60 threshold, I can open the aperture and/or raise the ISO. The handheld limit varies by lens and by photographer. When I do use a tripod and there is no wind, shutter speed is negligible. The surroundings can sometimes provide support too; I often lie down and use the ground for stability.
- I choose the aperture according to the kind of photo I want to make and what the conditions—the available light—allow. Depth of field with a dedicated macro lens—such as the Nikon Z MC 105mm f/2.8 VR S—is very limited, so much of the image is out of focus. That blur plays a major role in the photo and can strengthen or distract from the subject. Finding the right composition therefore involves the entire frame, not just the subject.
- Autofocus on macro lenses often hunts for a long time because the subject is so close that the lens may struggle to focus by itself. Many macro photographers, including me, switch to manual focus. This gives you more direct control over the magnification and exactly where focus is placed.
- This is the focusing technique I use: I hold the viewfinder to my eye and slowly move the lens toward the subject. As soon as the right area is sharp and I have found the composition, I press the shutter. When shooting handheld, I must remain motionless at that moment; that often works best just after exhaling.
Working without a tripod allows for greater creativity because you can literally photograph from any angle. I regularly lie flat on the ground and use vegetation to create blur and atmosphere. The composition is determined first by where the subject is and then by the position I take—and that is precisely what creates so many possibilities.
Photos and text: © Loulou Beavers



