This is the first installment in a series of articles about landscape photography. This article focuses on light and composition. The second part will focus mainly on technique and equipment. In the third and final part of this series, the theory from the first 2 parts will be put into practice.
Light, light, and more light……………
Light is the single most important element in landscape photography. Without light, of course, you cannot take photographs. After all, photography literally means writing with light. Light can have many different qualities, however. Important aspects of light quality include intensity, contrast, and color temperature
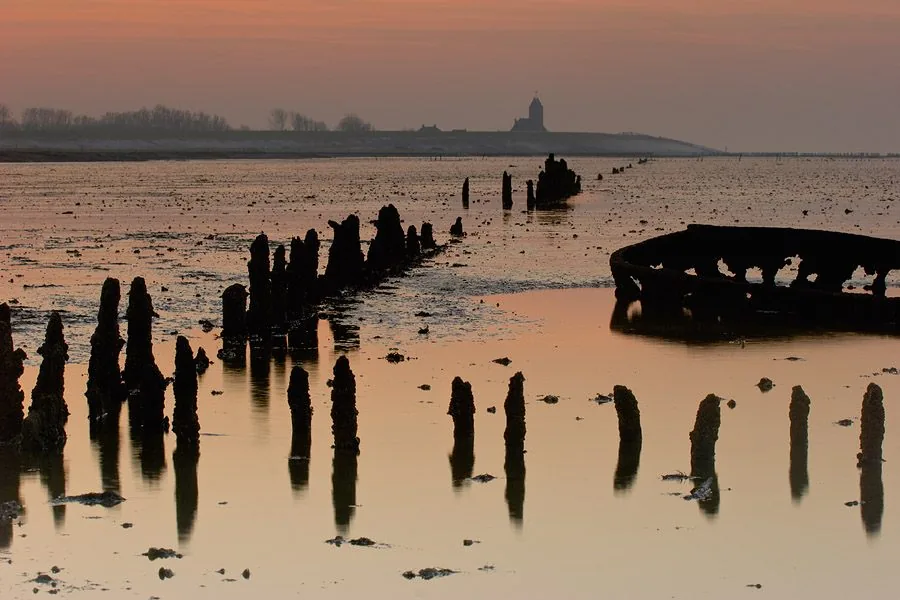
The light before sunrise and after sunset deserves special attention. The sun itself is not visible then, but its first rays still reach over the horizon. This can produce magnificent colors. A pleasant side effect is that the landscape has few or no visible shadows in these conditions.
In the morning and evening, the light is warmer and softer than during the day. This is due to the position of the sun. At sunrise and sunset, the sun is low above the horizon and its rays shine parallel to the earth. The low sun puts subjects in the “spotlight.” It creates long shadows that contribute to a 3D effect—ideal light for photography.
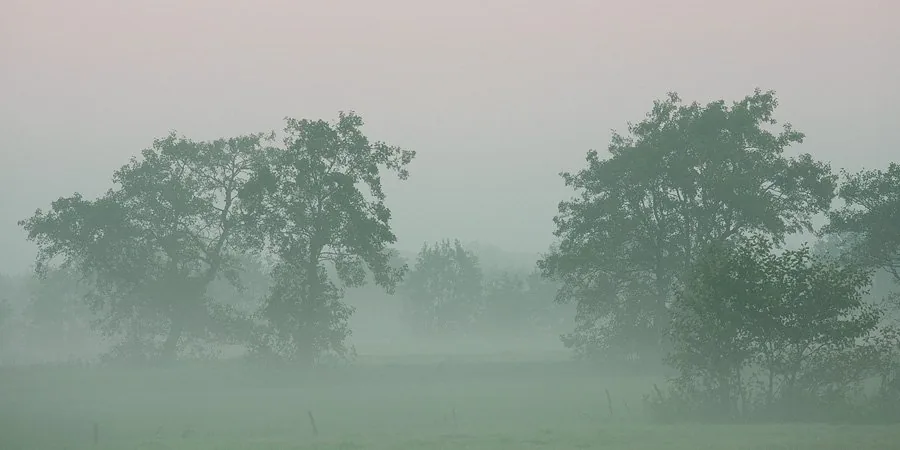
It may not seem obvious, but you can also take excellent landscape photographs in foggy or overcast weather. Clouds and fog filter direct sunlight, reducing the contrast. This creates soft, diffused light without harsh shadows. A foggy morning when the sun is just about to break through the mist can produce a particularly dramatic image.
From a few hours after sunrise until a few hours before sunset, the sun is high in the sky. The light is much harsher then, resulting in high contrast. This harsh light is often unattractive for photography. In that case, you can look for places where the light is filtered, such as beneath the forest canopy. The middle of the day is also an excellent time to wander around and scout beautiful locations that look promising in the morning and evening light and could yield attractive compositions.
Composition: tips and tricks
Taking a photograph begins with looking. This may seem obvious, but it certainly is not. The difference between a ‘snapshot’ and a ‘good photograph’ lies in the composition. There are no fixed rules for creating a good composition, but there are several guidelines that can help you create an appealing image. These include leading lines, viewpoint, the division of the frame, the rule of thirds, and foreground and background elements.
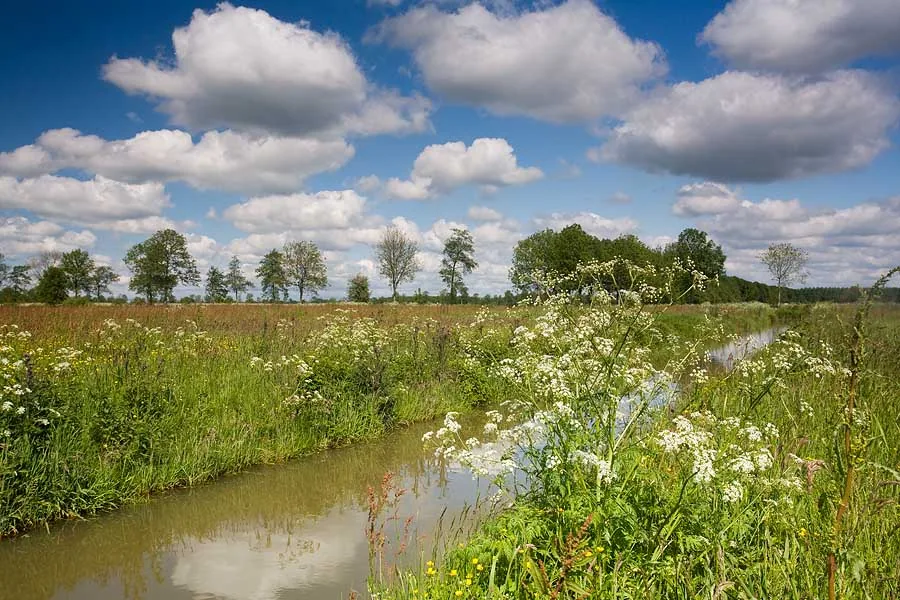
To create depth in a photograph, you can use the lines present in the landscape. The ditch in the photograph of the Oude Riet begins at the bottom left of the frame and leads the eye toward the horizon. This is what we call a leading line.
Choosing a low viewpoint strengthens this line. The cow parsley is an attractive foreground element that draws the eye. Positioning the cow parsley stems that extend above the horizon directly in front of the group of trees in the background creates depth and avoids “competition” with the isolated trees on the horizon.
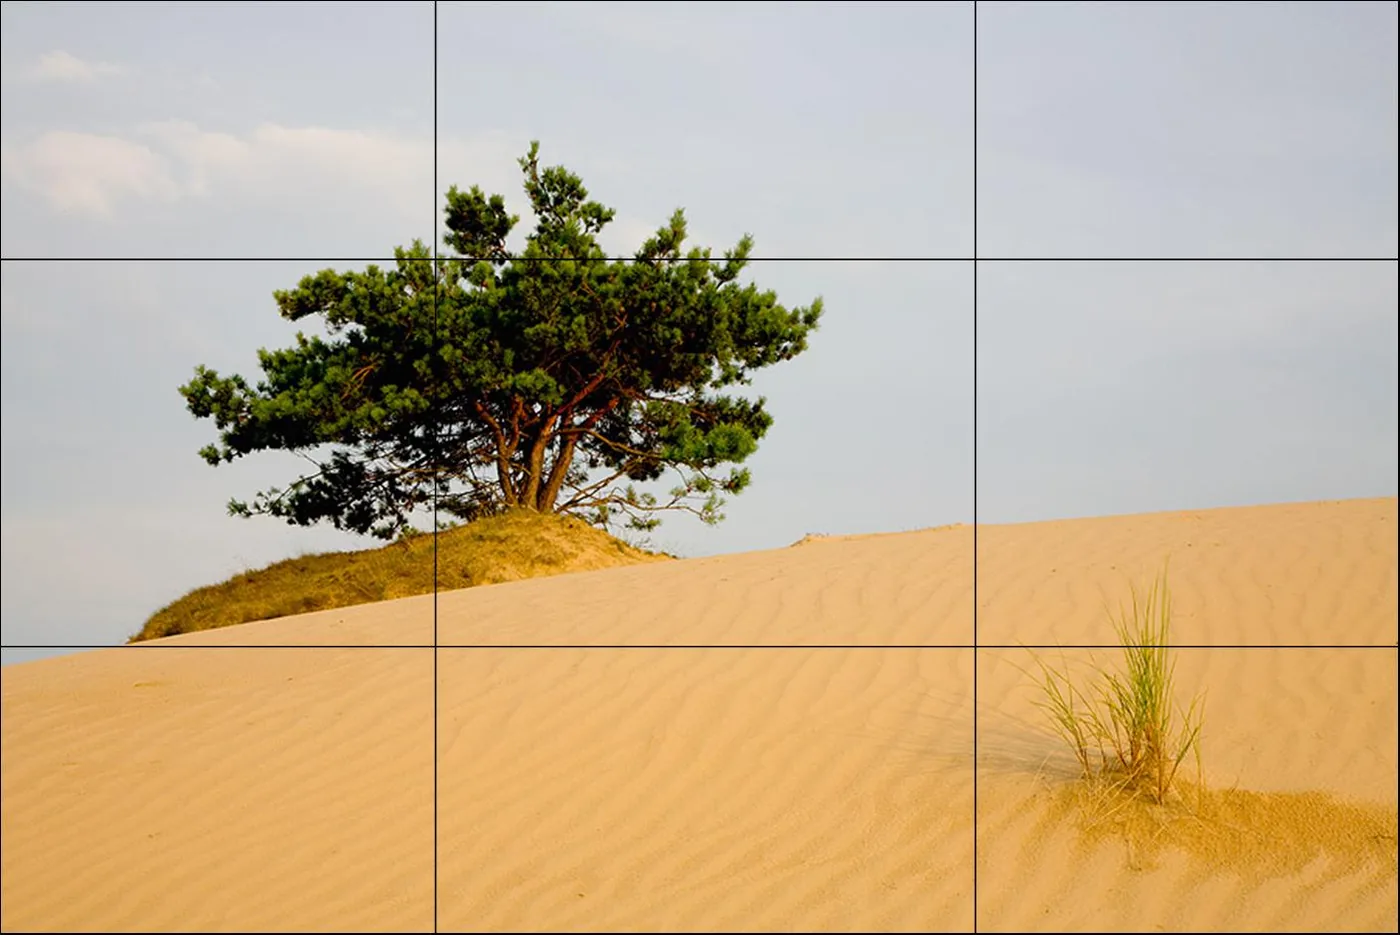
The rule of thirds is a familiar concept. To illustrate this rule, four lines have been drawn on the photograph of the Kale Duinen, dividing it into thirds both horizontally and vertically. This creates 9 sections and 4 intersections. We can use this division of the frame as a starting point for creating a composition.
Positioning the subject on or near one of the intersections often produces a more interesting image than placing it right in the center. The horizontal lines can be used to determine the position of the horizon, placing it off-center as well.
This can be seen clearly, for example, in the photographs “Fog” and “Wierum after sunset.” The Kale Duinen example again uses foreground and background elements to create perspective. The ripples in the sand give the photograph depth and make the dune appear higher. The low sun creates long shadows that accentuate the ripples.
Next time
In part 2 I will discuss technique and equipment. What do you need, and how do you use it?



